Cost Control — Track and Optimize LLM Spending
Access: Tenant Admins only
The Cost Control module answers the question: How much are my AI agents costing in LLM tokens, and where is the money going?

What is Cost Control?
Every time an AI agent processes a request, it consumes tokens from the underlying LLM (like Gemini, GPT, Claude, etc.). These tokens cost money. Cost Control gives you complete visibility into:
- Total estimated cost across all agents
- Cost breakdown by agent, user, and session
- Token usage patterns (input vs. output vs. thinking tokens)
- Cost trends over time
Why it matters:
- LLM costs can grow quickly as usage increases
- Without visibility, you can't optimize spending
- Some agents or users may consume disproportionately more tokens
- Understanding token breakdowns helps you write more efficient prompts
Note: TraptureIQ tracks token usage accurately, but your actual LLM API costs are billed directly by your cloud provider (Google Cloud, OpenAI, etc.) — not through TraptureIQ. The costs shown here are estimates based on published model pricing.
How to Use the Cost Control Page
Step 1: Open Cost Control
Click Cost Control in the sidebar.
Step 2: Review the Key Metrics
At the top of the page, you'll see summary cards:
| Metric | What It Shows |
|---|---|
| Total Estimated Cost | The estimated dollar cost of all LLM usage in the selected time range |
| Total Tokens | Total number of tokens consumed across all requests |
| Input Tokens | Tokens from user prompts and system instructions |
| Output Tokens | Tokens from agent responses |
| Thinking Tokens | Tokens used for internal reasoning (for models that support it) |
Step 3: Analyze the Charts
Cost Over Time (Line Chart)
- Shows how spending trends over the selected time range
- What to look for: Upward trends, unexpected spikes, or usage patterns by day/hour
Cost by Agent (Bar Chart)
- Shows which agents are the most expensive
- What to look for: One agent dominating costs may indicate an inefficient prompt, verbose responses, or excessive tool usage
Token Breakdown per Agent (Stacked Bar Chart)
- Shows the ratio of input vs. output vs. thinking tokens per agent
- What to look for: High thinking tokens may indicate the agent is doing excessive internal reasoning; high output tokens may indicate verbose responses
Token Trend Over Time
- Shows how token usage changes over time
- What to look for: Correlate with usage growth — is cost growing faster than usage? That suggests decreasing efficiency.
Step 4: Review the Session Cost Table
A detailed table showing the cost and token breakdown for each individual chat session:
| Column | What It Shows |
|---|---|
| Session | Session name (auto-generated from the first message) |
| Agent | Which agent was used |
| User | Who initiated the session |
| Total Tokens | Total tokens consumed in the session |
| Input / Output / Thinking | Token breakdown by type |
| Estimated Cost | Estimated dollar cost for the session |
| Latency | Response time |
This table is sortable — click any column header to sort by that value. Sort by cost (descending) to find the most expensive sessions.

Step 5: Filter the Data
| Filter | What It Does |
|---|---|
| Agent | Show costs for a specific agent only |
| User | Show costs for a specific user's activity |
| Time Range | Predefined ranges or custom date range |

Understanding Token Types
| Token Type | What It Is | How to Optimize |
|---|---|---|
| Input Tokens | Tokens from the system prompt + user message + conversation history sent to the LLM | Shorten your system prompt, limit conversation history length |
| Output Tokens | Tokens in the agent's generated response | Add instructions like "be concise" to your system prompt |
| Thinking Tokens | Tokens used for internal reasoning (chain of thought) — only for models that support it | Some reasoning is good, but excessive thinking wastes tokens. Review traces to check reasoning efficiency |
Common Use Cases
| Scenario | What to Do |
|---|---|
| "How much did we spend this month?" | Set time range to "Last 30 days" and check the Total Estimated Cost card |
| "Which agent costs the most?" | Check the "Cost by Agent" bar chart |
| "Why is one agent so expensive?" | Filter by that agent, then check the Token Breakdown chart. Are thinking tokens high? Are output tokens excessive? |
| "I need to reduce costs" | Sort the session table by cost (descending) to find expensive sessions, then analyze their token breakdown. Optimize system prompts for efficiency. |
| "Is our cost growing faster than usage?" | Compare the Cost Over Time chart with the Usage Dashboard's Request Volume chart |
Tips for Beginners
- Check weekly — A quick weekly review helps you catch cost anomalies early.
- Focus on the top-cost agents — Optimizing the most expensive agent has the biggest impact.
- Optimize prompts — The system prompt is sent with every request. Shortening it by 100 tokens saves 100 tokens × every request.
- Use the Analyser — Draft prompts in the Analyser to check token counts before deploying.
- Sort by cost — The session table sorted by cost quickly shows your most expensive interactions.
Token Budget
The Token Budget feature lets you set monthly token limits for your workspace — so you always know when usage is getting too high, before it becomes a surprise on your cloud bill.
Important: Token budgets are soft limits. Setting a budget does not stop your agents from responding. If a budget is exceeded, you will receive an alert email — agents continue operating normally.
What You Can Set
| Budget Type | What It Covers |
|---|---|
| Tenant-wide Budget | Total tokens across all agents in your workspace for the month |
| Per-Agent Budget | Token limit for a specific individual agent |
You can set both at the same time — for example, a workspace-wide limit plus tighter limits on high-usage agents.
How to Set a Token Budget
Step 1: Open the Token Budget tab
Go to Cost Control in the sidebar, then click the Token Budget tab.

Step 2: Set a Tenant-wide Budget
In the Tenant-wide Budget section on the left:
- Enter a monthly token limit (e.g.
5000000for 5 million tokens) - Make sure Active is checked
- Click Save Tenant Budget
Step 3: Set a Per-Agent Budget (optional)
In the Per-Agent Budget section on the right:
- Select an agent from the dropdown
- Enter a monthly token limit for that agent
- Make sure Active is checked
- Click Save Agent Budget
Repeat for any other agents you want to track individually.
Viewing Current Usage
Once budgets are set, the Current Month Usage vs Budget section shows you:
- How many tokens have been used so far this month
- The progress bar colour tells you at a glance how close you are to the limit:
- 🟢 Green — usage is healthy (under 80%)
- 🟡 Amber — approaching the limit (80–99%)
- 🔴 Red — budget exceeded (100%+)
Agent budgets are shown as a compact grid so you can monitor many agents at once.
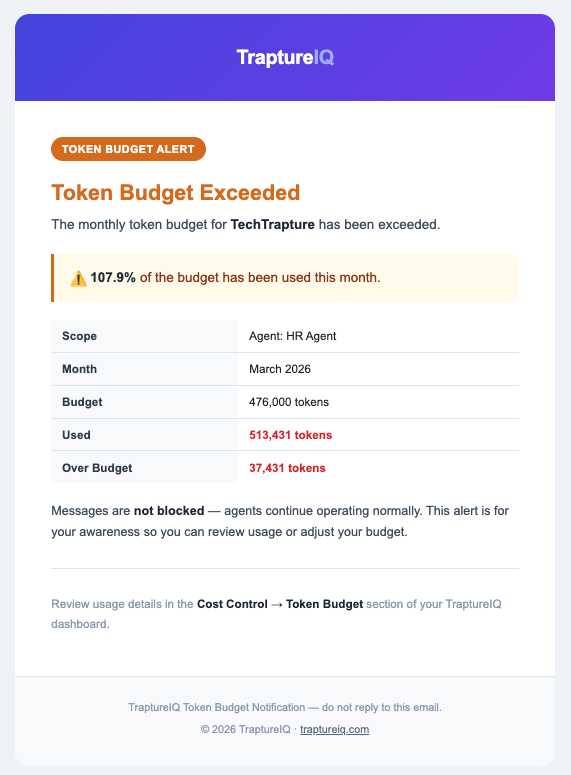
Alert Emails
When a budget is exceeded, TraptureIQ automatically sends an alert email to all Tenant Admins in your workspace. The email includes:
- Which budget was exceeded (tenant-wide or which agent)
- How many tokens were used vs. the budget
- The percentage over budget
To avoid inbox noise, alerts are sent at most once every 24 hours per budget — even if usage continues to grow.
Removing a Budget
Click Remove (or ✕ on agent cards) next to any budget to delete it. The budget is removed immediately and no further alerts will be sent for it.
Common Questions
Will my agents stop working if the budget is exceeded? No. Budgets are informational — your agents will continue responding normally. The budget is purely for your awareness and cost tracking.
Can I set both a tenant budget and per-agent budgets? Yes. Both work independently. You can have a workspace-wide limit and separate tighter limits per agent at the same time.
What counts towards the token budget? All token usage by your agents for the current calendar month — including input tokens (prompts), output tokens (responses), and thinking tokens (internal reasoning).
When does the budget reset? Budgets reset at the start of each calendar month. Previous months' usage does not carry over.
Context Management
The Context Management tab helps you understand how much of the session token limit your users are consuming — and identify who is hitting or approaching those limits.
Long conversations accumulate context over time. As a session grows, agent responses can become less accurate and more expensive. Context Management gives you the visibility to act before that happens.
What Is a Session Token Limit?
Every chat session has a token limit — a soft ceiling on how much conversation context the agent is carrying. As a user chats, the context grows with every message. When it gets too large:
- At 90% — the user sees a warning bar in the chat
- At 100% — the user sees a popup suggesting they start a new session
Requests are never blocked. These are informational nudges only.
Setting the Session Token Limit
Go to Cost Control → Context Management, then scroll to the Default Limit section.

- Enter a token limit (default is 100,000 tokens)
- Make sure Active is checked
- Click Save
The warn threshold is calculated automatically:
- Warn at: 90% of your limit
- Popup at: 100% of your limit
Monitoring Context Usage
The Context Usage section at the top of the tab gives you an at-a-glance view of how your team is using session context.

| Card | What It Shows |
|---|---|
| Over Limit | Sessions that have exceeded 100% of the token limit |
| Near Limit (≥90%) | Sessions approaching the limit but not yet over it |
| Users Affected | Distinct users with at least one flagged session |
| Total Sessions Flagged | Combined count of warning and over-limit sessions |
Filtering and Reviewing Sessions
Use the filter buttons to narrow the table:
| Filter | Shows |
|---|---|
| All | Every session at or above the 90% threshold |
| Over Limit | Only sessions that have crossed 100% |
| Near Limit | Only sessions in the 90–100% range |
The table shows:
| Column | What It Means |
|---|---|
| User | The user who owns the session |
| Agent | Which agent was used |
| Tokens Used | Current context size of the session |
| Limit | The effective token limit for that agent |
| Usage | Visual progress bar and percentage |
| Status | Over Limit (red) or Near Limit (amber) badge |
| Summary | Whether the user has generated a context summary for this session |
Click ↻ Refresh at any time to reload the latest data.
What Users See in the Chat
Users do not need to understand tokens — TraptureIQ handles the communication automatically.
Warning bar (at 90%) A thin progress bar appears above the message input, showing how full the session context is. It turns amber as the session approaches the limit and red when it is exceeded.
Over-limit popup (at 100%) When a session crosses the token limit, a popup appears with three options:
| Option | What It Does |
|---|---|
| Generate Summary | Creates a short AI-generated summary of the key context from the current session |
| New Session with Summary | Opens a fresh session with the summary pre-loaded so the agent has context from the previous conversation |
| Start Fresh | Opens a new empty session |
Once a summary is generated, it is shown in a green card in the chat — the user can refer to it before starting a new session.
Common Questions
Will my users be blocked from chatting when the limit is reached? No. The popup is informational only. Users can continue sending messages in the same session — their requests will never be blocked.
What is the default token limit? 100,000 tokens. You can adjust this in the Default Limit section of the Context Management tab.
What does "Generate Summary" do? It creates a short 2–3 sentence AI summary of the conversation's key context, decisions, and open items. This can then be carried into a new session so the agent doesn't lose important background.
Can I set different limits for different agents? Per-agent overrides are coming soon. Currently, one default limit applies to all agents in your workspace.